
JavaFX Fundamentals
The Counter & Music Player app
Here’s the final app you will end up making:
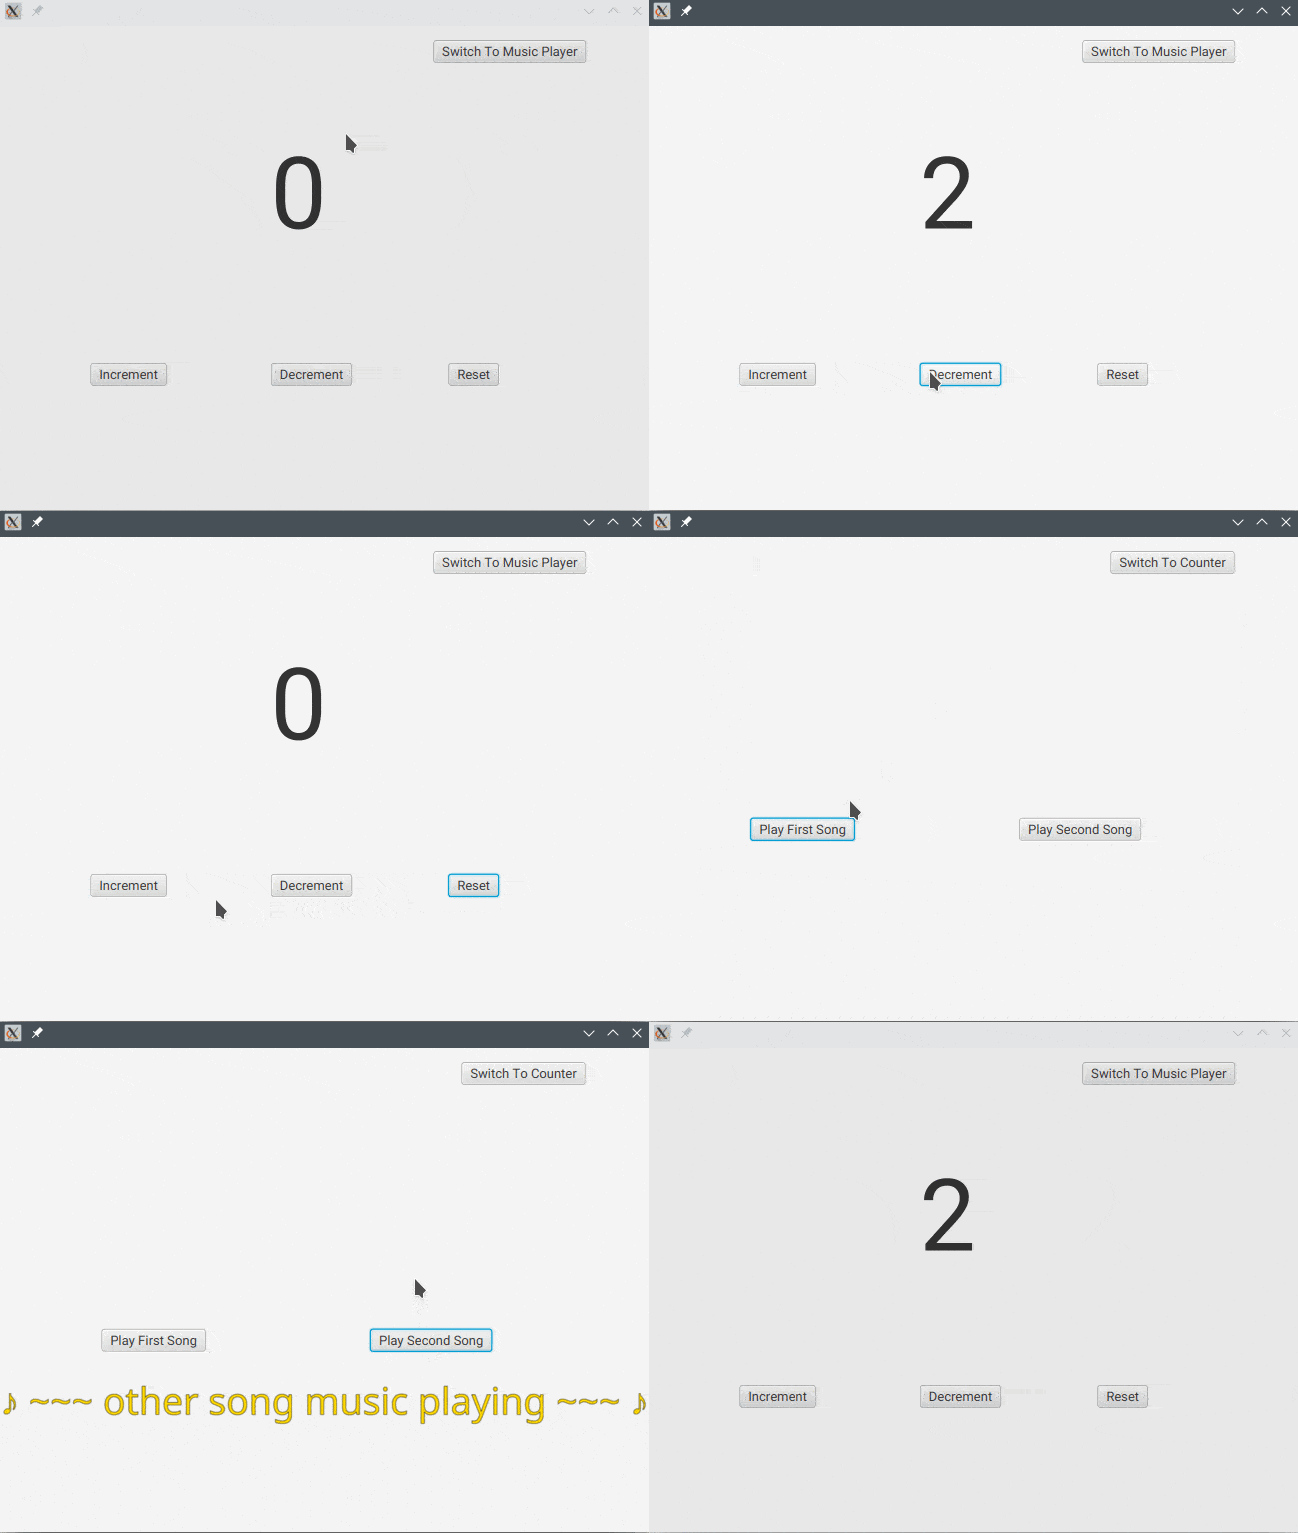
It has two parts to it:
- Counter: Displays a number, with the following buttons:
- Increment the number by 1,
- Decrement the number by 1,
- Reset the number to zero,
- Switch to the Music Player.
- Music Player: Simple music player with the following buttons:
- Play the first song,
- Play the second song,
- Switch to the Counter.
Starter code given
The starter code provided to you is a blank Maven project with all the necessary dependencies you need (specified in the pom.xml file) to create this app:
javafx-controlsjavafx-fxmljavafx-media
The key steps
More detailed instructions are in the Get Your Hands Dirty section below. But in a nutshell, the steps include:
- Importing the Maven project into your favourite IDE.
- Create a
counter.fxmlfile. - Use Scene Builder to add the controls.
- Create a
CounterController.javafile and connect it with thecounter.fxmlfile. - Specify an
fx:idfor the controls to thecounter.fxmlfile. - Add the controls as fields to
CounterController.java, annotated with@FXML. - Add a field to represent the state of the number.
- Specify the handler methods (declared in
CounterController.java) to each button’s On Action via Scene Builder. - Create
musicplayer.fxmlandMusicPlayerController.javafiles, and repeat the above steps for the music interface. - Create a central controller to control switching of the
Parent rootnode for the app’s mainScene.
Common issues you might encounter
- The
counter.fxmlfile isn’t created (or it’s not in the correct place). - FXML files (from Scene Builder) aren’t properly saving after an edit. You are encouraged to keep the FXML file open in the IDE to actually see it is being updated as you change things in Scene Builder.
- When you connect the FXML to the Java controller file, check the correct class name is used, with the full package name also. Again, looking at the FXML is a good help.
- Did you use the correct handler name (from Scene Builder) of the method you are trying to call in the controller?
- Incorrect names of the
@FMXLfields (in the controller) with respect to what’s actually written as thefx:idin Scene Builder. - Using the incorrect type of the
@FXMLfield. For example, you have added 3xButtonand 1xLabelin Scene Builder, but in the controller you declare all of them asButtontype.
 Get your hands dirty!
- Fork the JavaFX Introduction to Fundamentals repository to your GitHub account, then clone your fork.
- Import the project into your preferred IDE (see the FAQ for help).
- Run the code using the Maven wrapper:
- Windows:
.\mvnw.cmd clean javafx:run - Linux/Mac:
./mvnw clean javafx:run
- Windows:
- You will see a BUILD FAILURE.
- Scroll up slowly, and try to look in the stack trace for file names that might appear to be leading to your project code. For example, the red section:
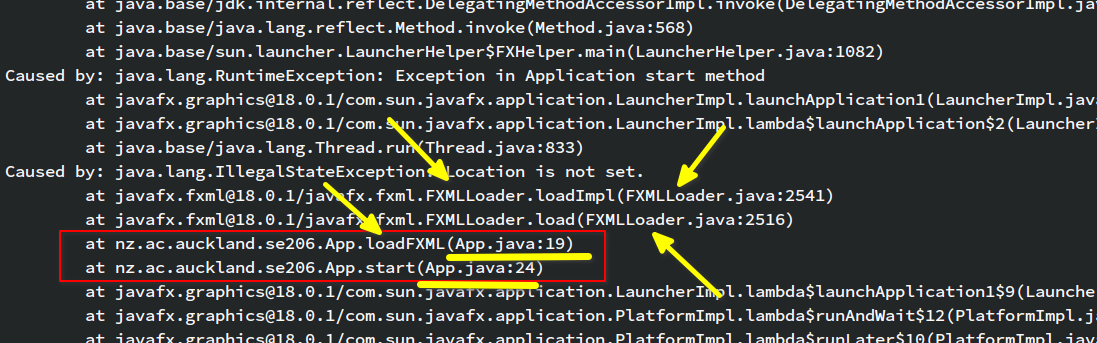
- Spend some time trying to analyse and looking for hints. All the evidence appears to be pointing to something to do with loading the FXML file. What FXML file? Go to the line relevant to your project, shown in the yellow underlines above (it might be different line numbers in your code). Here, it’s lines 19 and 24 of the
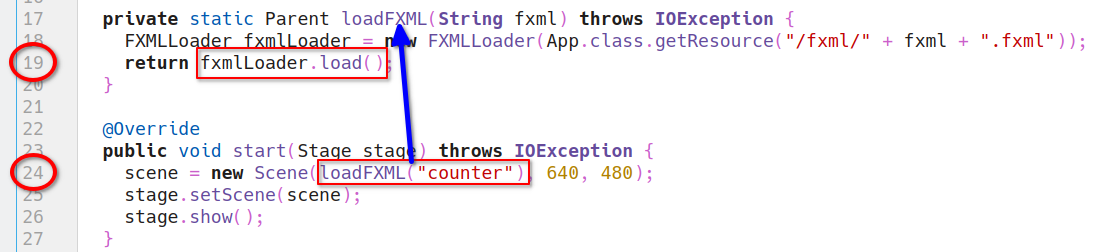
App.javafile. - Go to
App.java, and have a look at those lines. You can see that line 24 is calling line 17, which then goes on to line 18, and then line 19. After that, the program digs into JavaFX’s libraries and eventually complains. Line 18 is making reference to a resource called/fxml/counter.fxml. Does this exist? No!
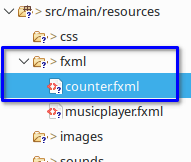
- Create a
counter.fxmlfile, and place it in theresources/fmxl/folder:
- The
counter.fxmlshould have at least a root node of some sort (e.g. aStackPane). If you created the file yourself, then it will be empty—in which case you can place the following content in it:<?xml version="1.0" encoding="UTF-8"?> <?import javafx.scene.layout.StackPane?> <StackPane xmlns="http://javafx.com/javafx" xmlns:fx="http://javafx.com/fxml"> </StackPane>WARNING: If you get an error when copy-pasting this into your FXML file, make sure there isn’t any extra spaces at the front/top of your file. Make sure your FXML file starts with the
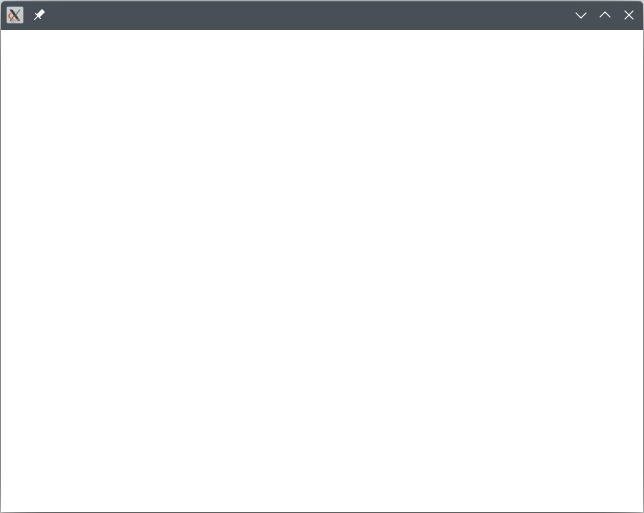
<?xml...>as the very first thing. - Run the code again, and you should see a blank JavaFX window appear:
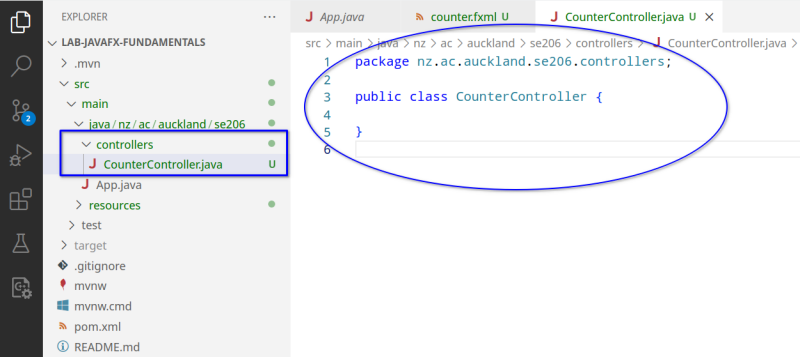
- Create a corresponding controller called
CounterController. You might want to organise it into acontrollerssub-package:
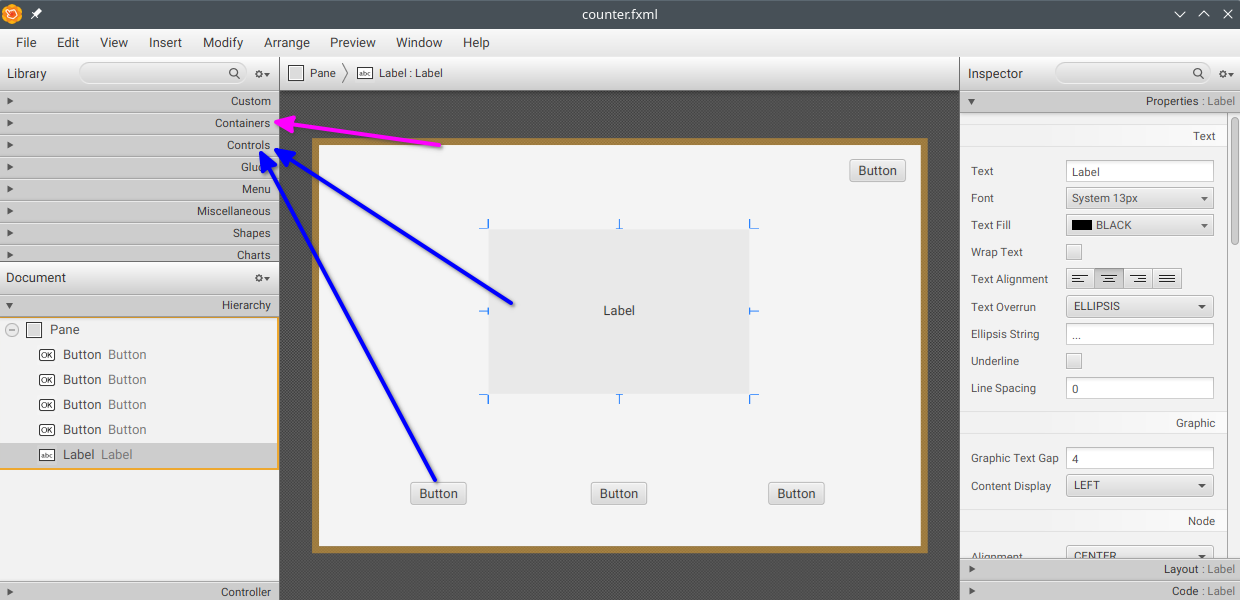
- Open the
counter.fxmlfile with Scene Builder, and add aPane(Containers) with aLabel(Controls) and fourButtons(Controls):
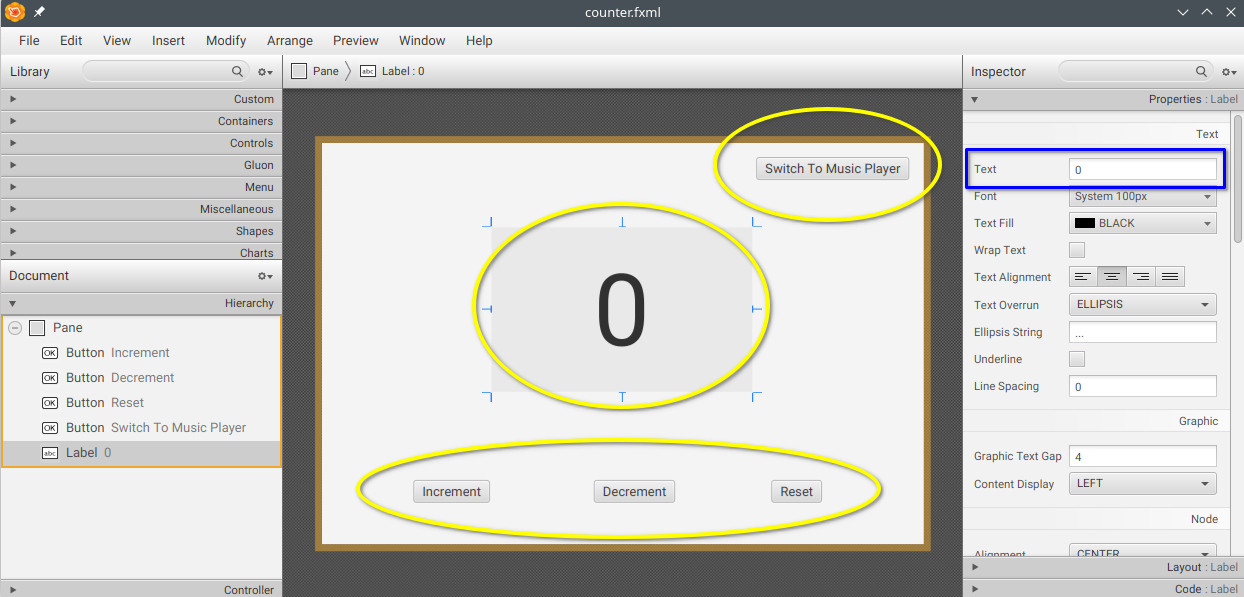
- Change the displayed
Textfor the label and buttons so they look like this:
- Specify the controller class for the FXML file. You need the full package name, and without the
.javaextension:
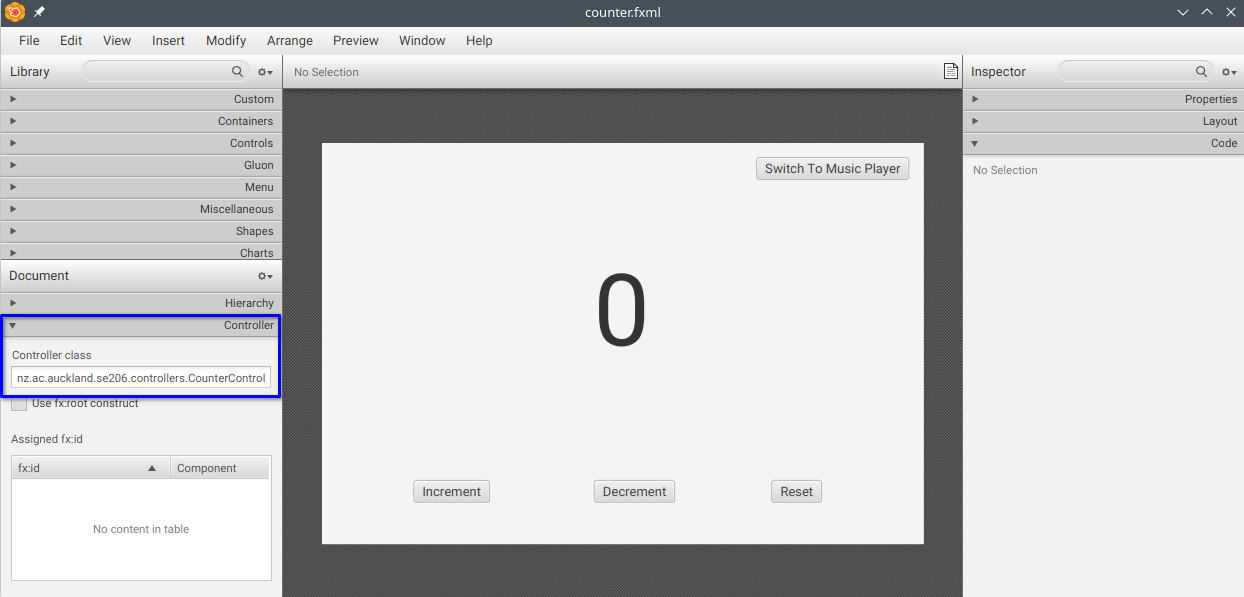
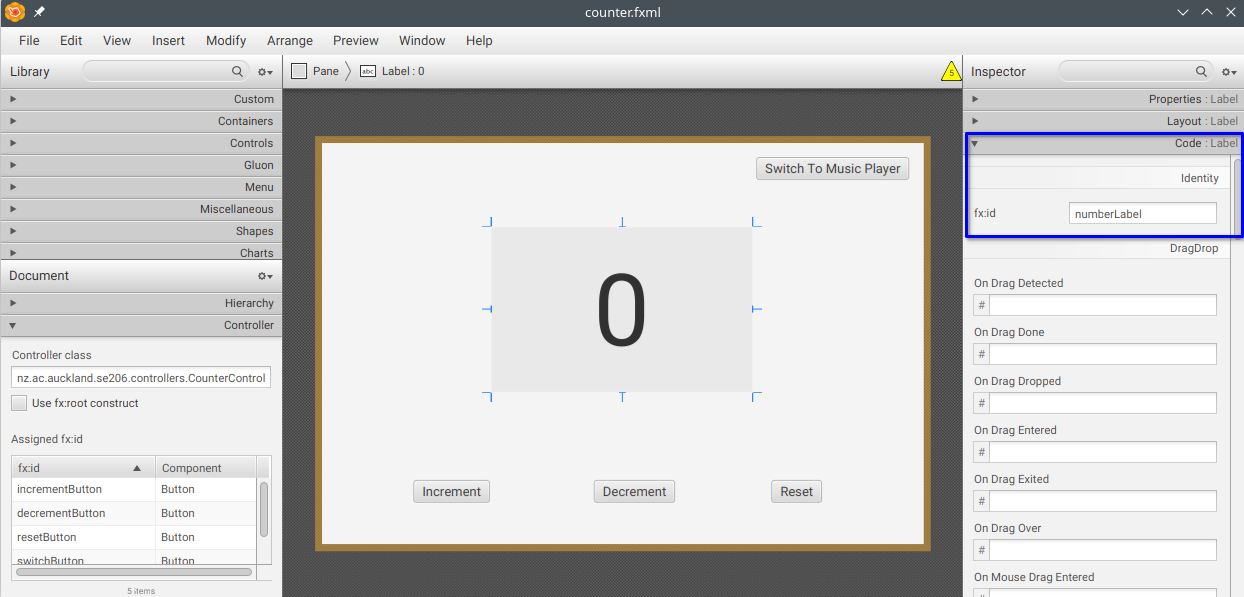
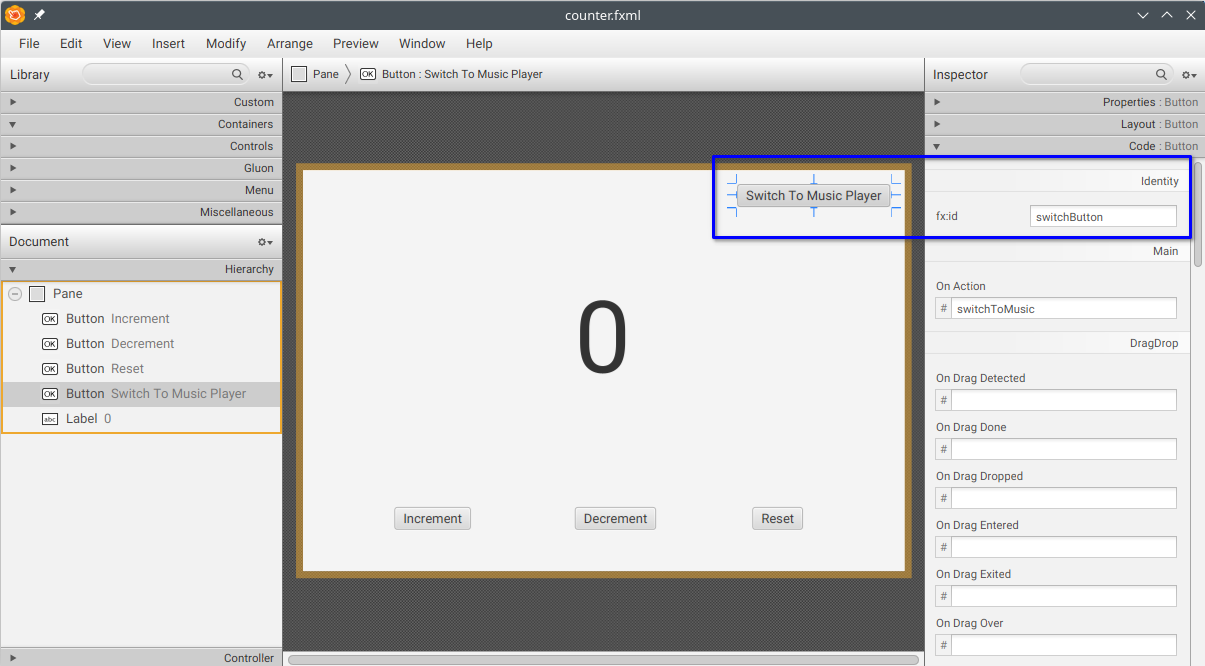
- Give an ID to your label and buttons. This will later correspond to fields inside the controller class:
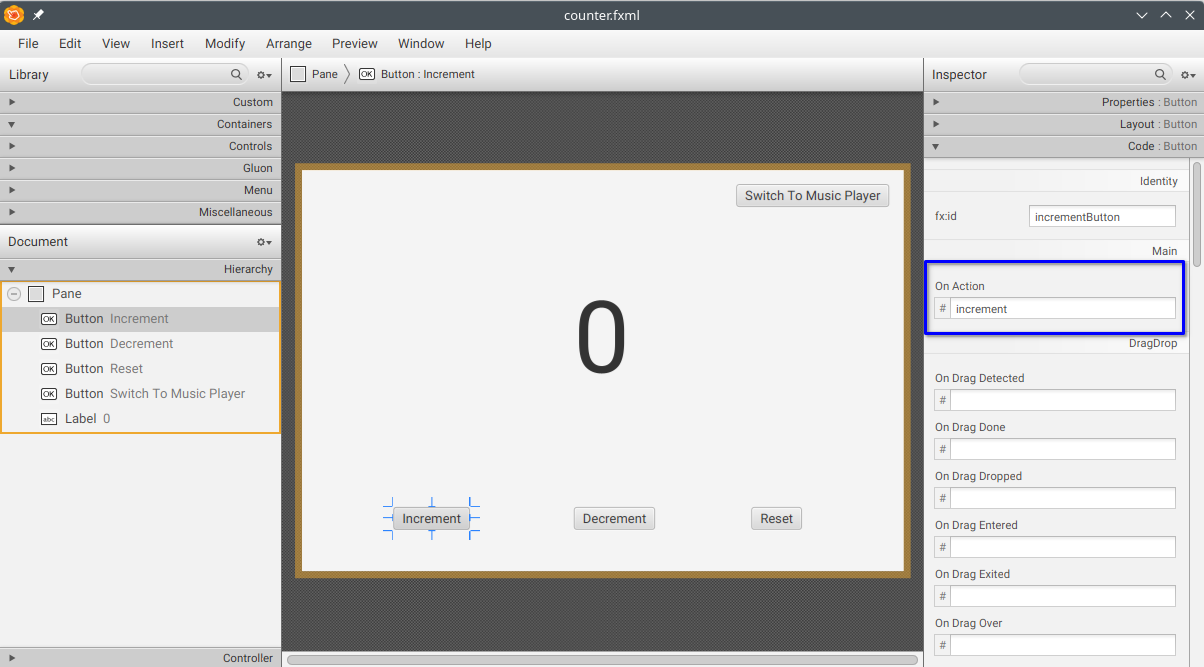
- Specify a handler method name in the On Action of each of the buttons:
- In your controller class, you will want to declare:
- Fields corresponding to the control IDs (e.g.,
private Button incrementButton;). - Methods corresponding to the On Action handlers (e.g.,
private void increment() { ... }).
- Fields corresponding to the control IDs (e.g.,
- You might see the following warning in your FXML file (e.g.,
The controller 'CounterController' has no field 'numberLabel', etc):
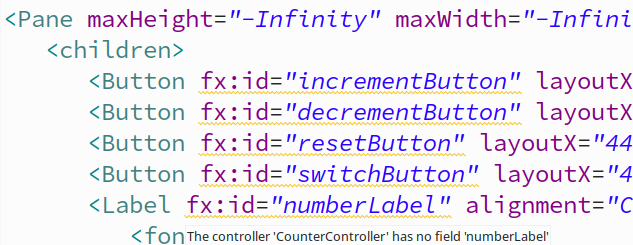
- This is due to the fields and methods being
privatein the controller class, which is usually the right thing to have. Go to your controller class and add the@FXMLannotation for all fields and methods that need to be accessed by FXML file. The warnings should go away.
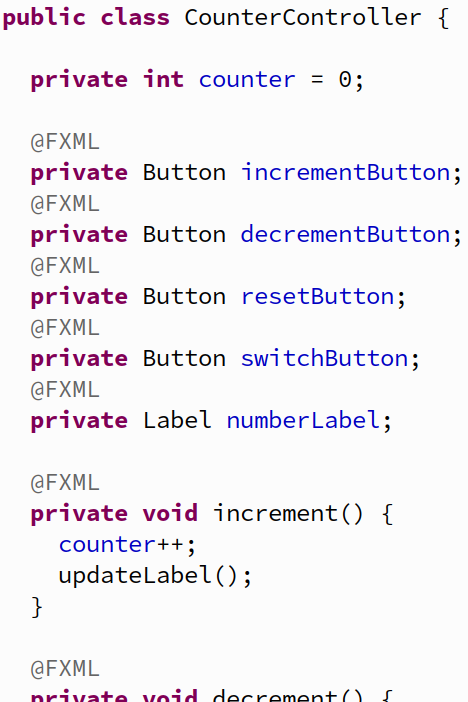
- Implement the logic of the increment(), decrement(), and reset() handlers so that these buttons change the label accordingly:
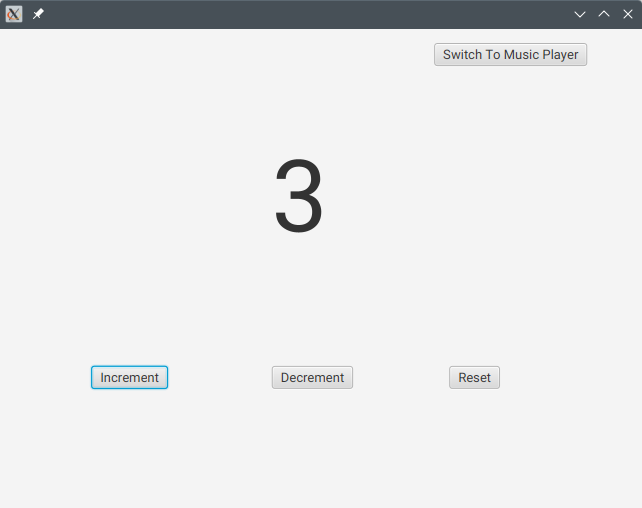
- Now it’s time to understand how the “switch” button will work:
- The handler for it will work similar to the others. However, we can also specify a parameter to the handler of type
ActionEvent. Add the following print statements to learn more about the source of this event:
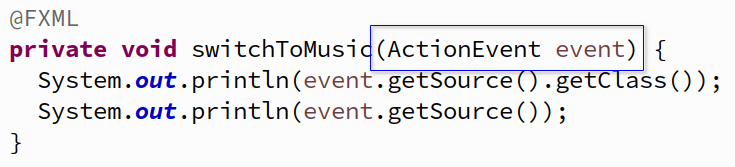
- Run your program again and click the button so we see what it prints. You will see that the source of the event is a
Button, namely the one you clicked:

- Now that we know it’s a
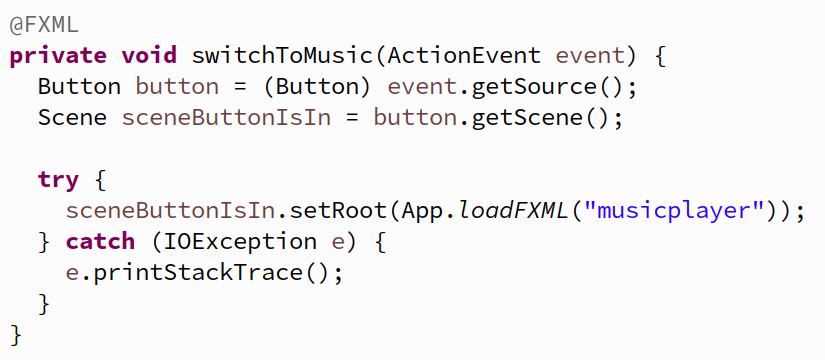
Button, we can cast to it. We can then get theScenethat this button is in by using thegetScene()method. Once you have a reference to theScene, you can set its root node using thesetRoot()method. This will overwrite the root you initially set in theApp’sstart()method. You can reuse theloadFXML()method in theAppclass, but you might need to make itpublic:
- Create a new FXML file called
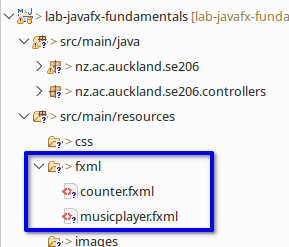
musicplayer.fxmlthat will correspond to the music player’s UI that you want to load when the switch button is clicked. You will also need to create aMusicPlayerController.javaand link it to the FXML file:
- You should Test it out. Once you click the switch button, it should load up the (currently blank) UI for the music player.
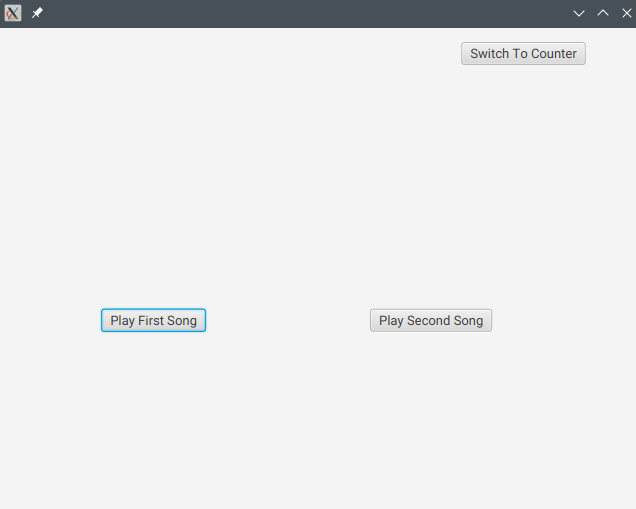
- Repeat the steps above to create a UI for the music player, so it looks like this. Don’t forget all the IDs and handlers also:
-
Go to dig.ccmixter.org or pixabay.com/music/, scroll down to one of the Dig! buttons, and find yourself a couple of nice songs. Download them, and save them to the
resources/sounds/folder:
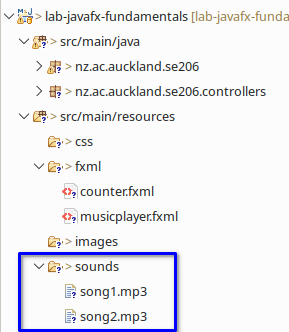
Alternatively, we have cached a couple from Pixelbay (Looking Forward and Risk) - Add a method called
@FXML private void initialize()in both your controllers, with the following code (notice we are also printing thethisinstance):

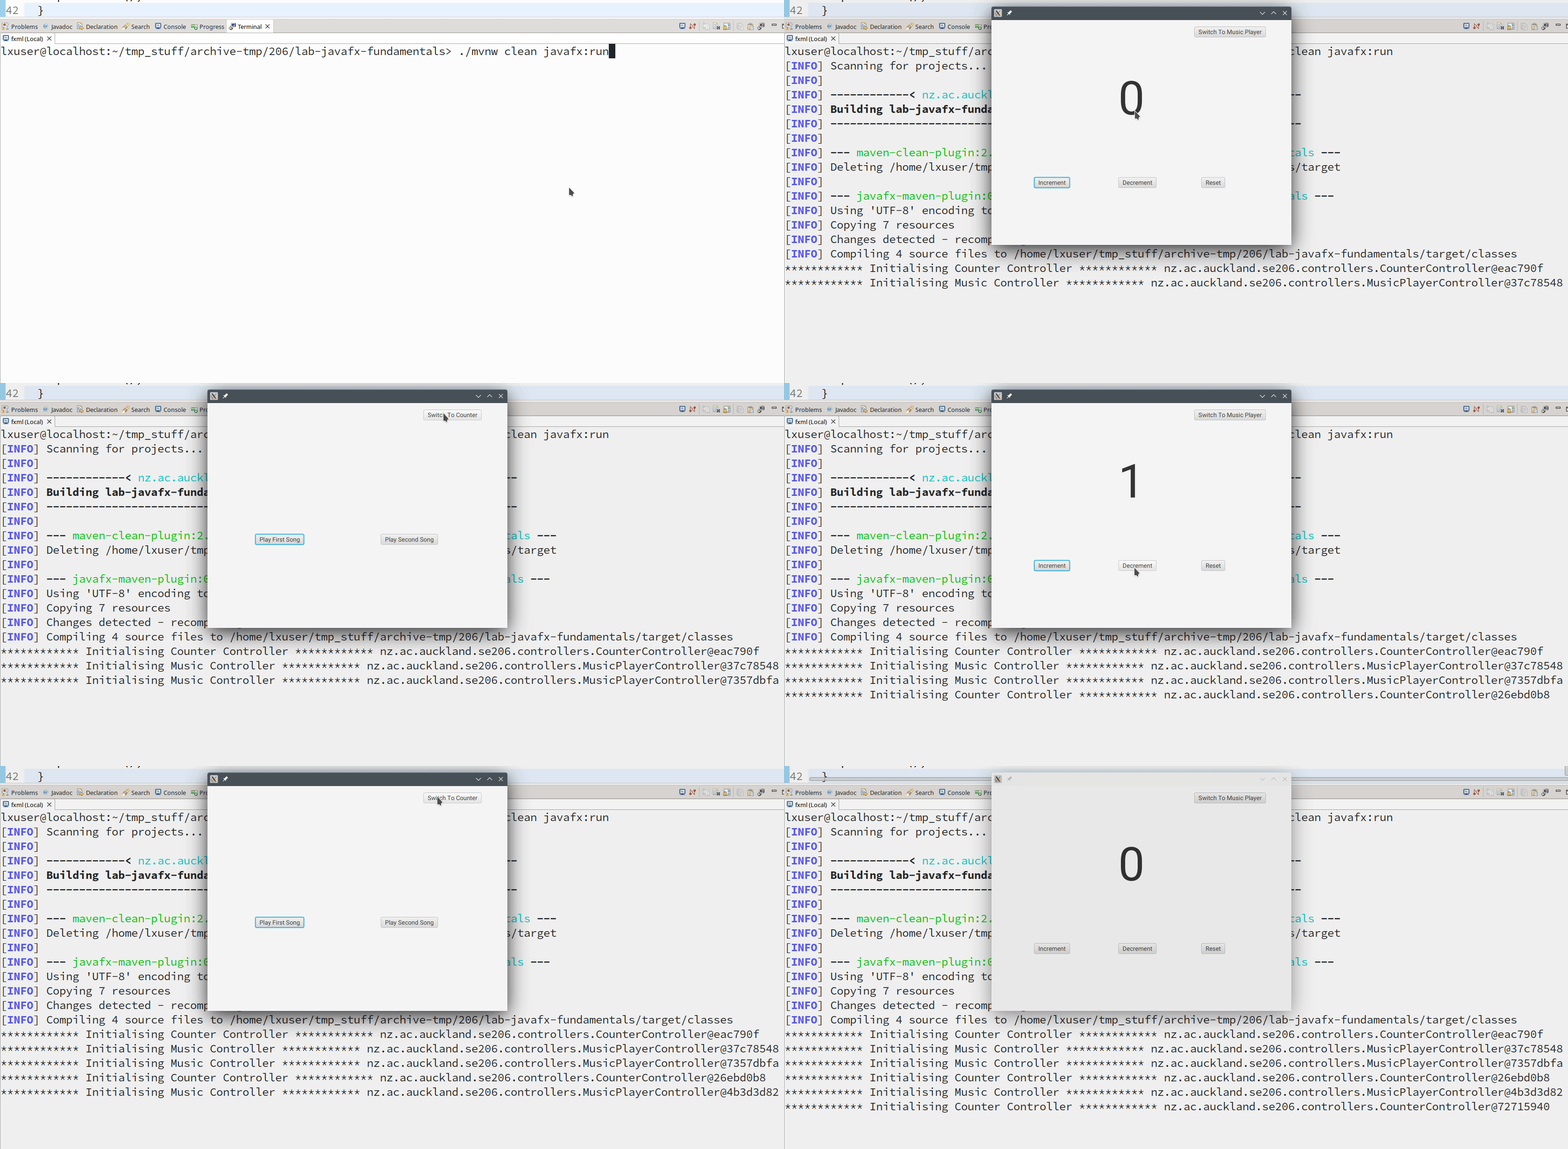
- Have a look at the output that gets printed to the terminal when you switch between the UIs. See how it’s a different instance (hence new initialisation) every time we switch between the UIs? You probably noticed also that the state isn’t saved for the counter UI, since it’s a new controller every time you go into it! This most likely isn’t the effect we want:
- Let’s tidy things up, by defining a centralised place to manage the content of the scene better. Create a new class and call it whatever you want. Here, we call it
SceneManager. Sorry, no copy-pasting here as it’s good practice to understand what’s happening by coding it yourself:
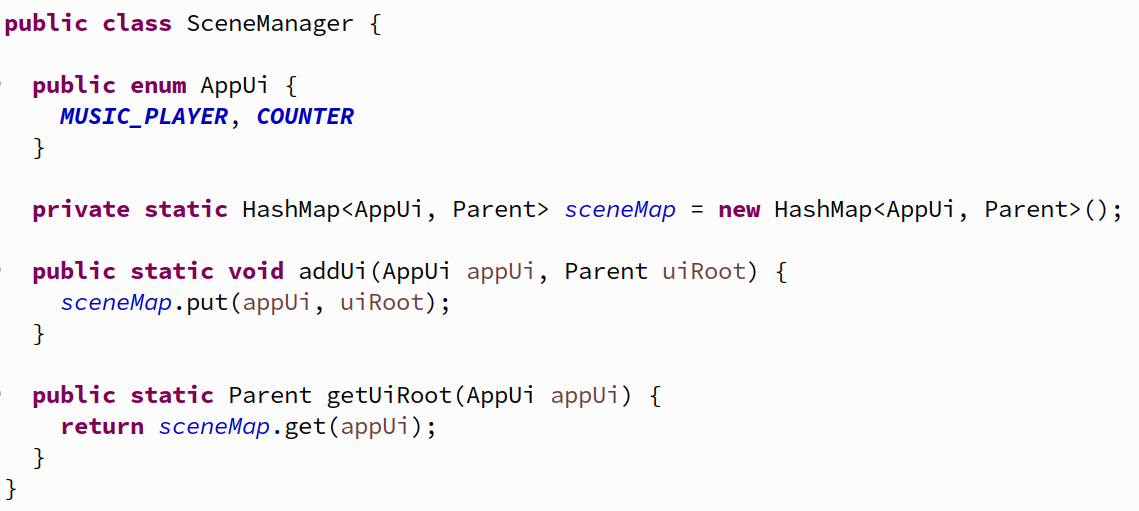
You don’t have to implement it this way. The main point here is that:- We store the roots of the UIs in a
HashMap, and associate then with anenumvalue. - This will allow us to look up the same root corresponding to each UI.
- So, how do we get the
Parentroots? That’s the next step!
- We store the roots of the UIs in a
- Go to your
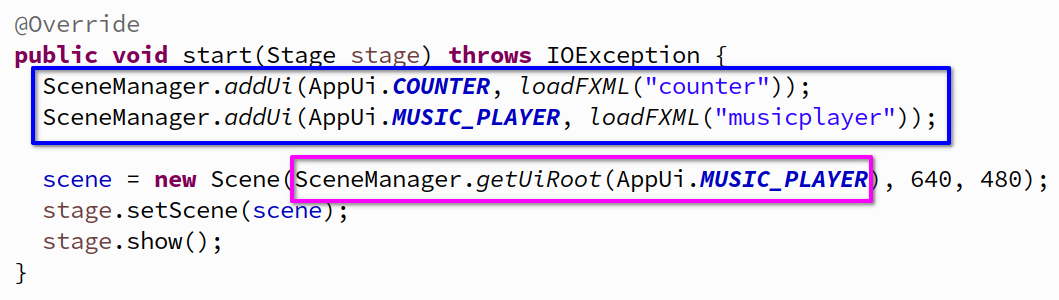
start()method in theAppclass, and reuse theloadFXML()method to get theParentnode of each UI, and connect it with the correspondingenumvalue through theaddUi()method. You can then set the initial UI using thegetUiRoot()method:
- Make use of the same
getUiRoot()method in your controller’s handers when you want to switch the UI:

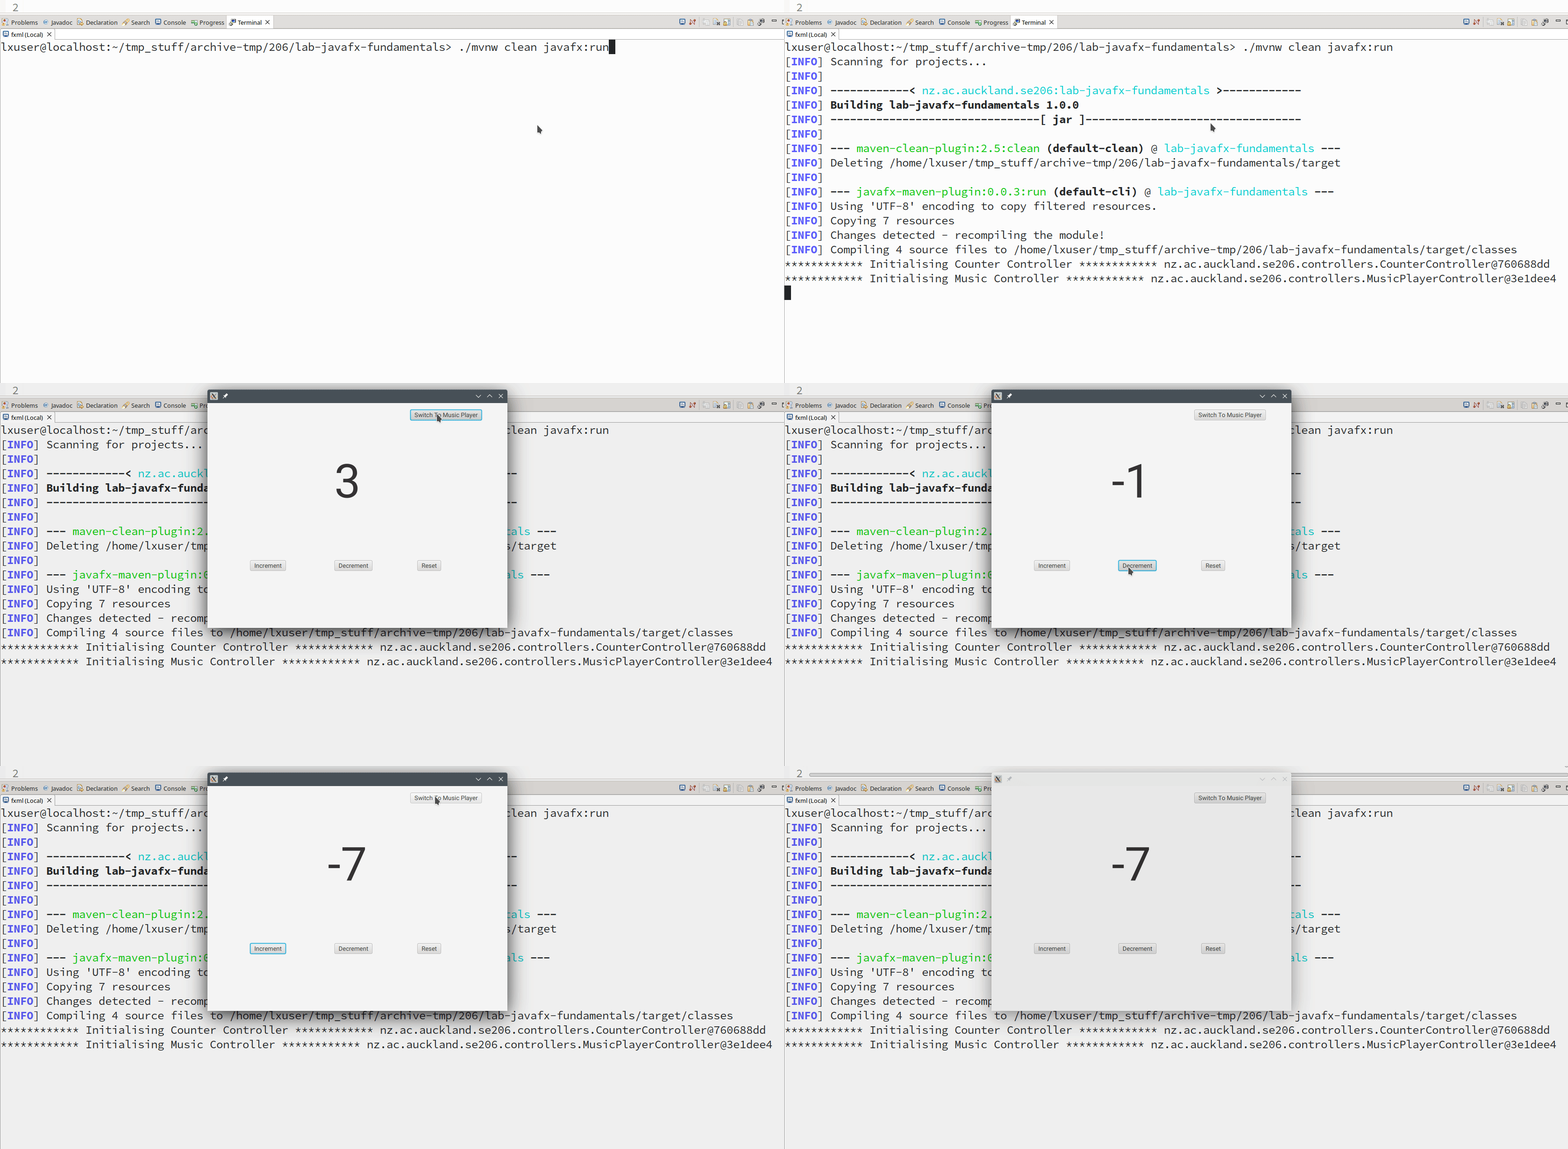
- Run your program again, and notice how each controller is only ever created once (the output of the
initialize()methods):
- Now it’s time to get your songs playing! This is left for you to figure out. But in a nutshell, here’s how you load a resource file (the audio file), place it in a
Mediaobject, create aMediaPlayerwith it, andplay()it:

- You will need a new
MediaPlayerinstance for eachMedia. You might want to make theMediaPlayerinstance accessible by other handlers so you canstop()it before playing another song, and before switching back to the counter UI. - Extra: Make the UI look a little nicer. Read up on applying CSS for JavaFX (store the CSS files in the
resources/cssfolder).