
GitHub Flow
Attention!: Before doing this lab you should read collaborative-git and then git-best-practices.
For Beta and Final releases, you CANNOT use git rebase and/or git squash, as we need to see the full history of the project
 Get your hands dirty! GitHub Flow
Step 1. Fork the JavaFX GitHub Flow repository to your GitHub account, then clone your fork.
Step 2. Import the project into your preferred IDE (see the FAQ for help).
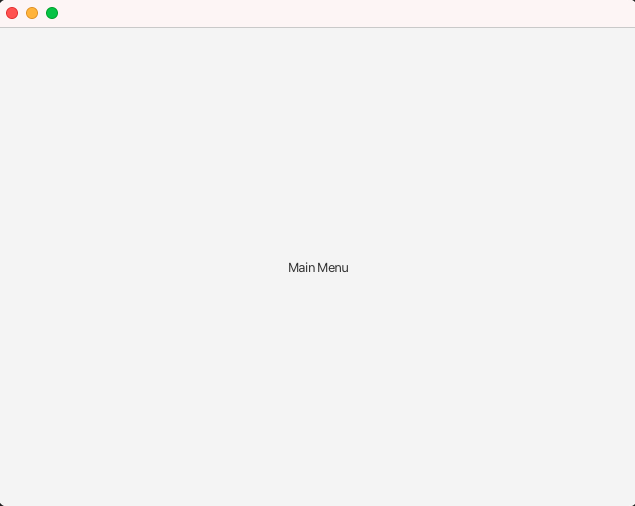
Step 3. Run the project using the Maven wrapper. The app should start up. You should see an empty scene with a Main Menu label.
Step 4. Close the app.
Step 5. Let’s use “GitHub Flow” to create a new functionality! First of all, from the command line execute git status, you should see the following:
On branch main
Your branch is up to date with 'origin/main'.

nothing to commit, working tree clean
It tells you that you are on the branch main and there is nothing to commit (no files were changed or added).
Step 6. Make a habit of executing git status very often to check which branch you currently are in and which files have changed that you might want to add to the next commit. Generally, before each commit, we suggest you execute git status.
Step 7. The feature that we want to create is a Sign-In page.
Step 8. What you need to do is to create a new branch, let’s call this branch feature/sign-in. Never use capital letters in branch names. To create a branch in your local repository, execute git branch feature/sign-in
Step 9. If you execute git branch you will see what are the branches in your repo. You can see that besides main there is the new branch that we have just created
 feature/sign-in
* main
The asterisk * means that we are currently on the main branch. This means that all the changes we are making now, we are doing them in the main branch. This is something that we don’t want. In the GitHub Flow we never directly commit to the main branch. We can only change the main branch by merging pull requests. Be careful that if you commit on the main branch directly, you will lose marks for the Beta and Final releases (i.e., you did not follow the GitHub Flow)
Step 10. To change branch, execute git checkout feature/sign-in. You will see the following output.
Switched to branch 'feature/sign-in'
Indeed, if you execute git branch now, you will see that the asterisk is on the feature/sign-in branch.
* feature/sign-in
  main
Executing git status will confirm that.
On branch feature/sign-in
nothing to commit, working tree clean
Note that the commands git branch feature/sign-in and git checkout feature/sign-in can be replaced by git checkout -b feature/sign-in as a shortcut.
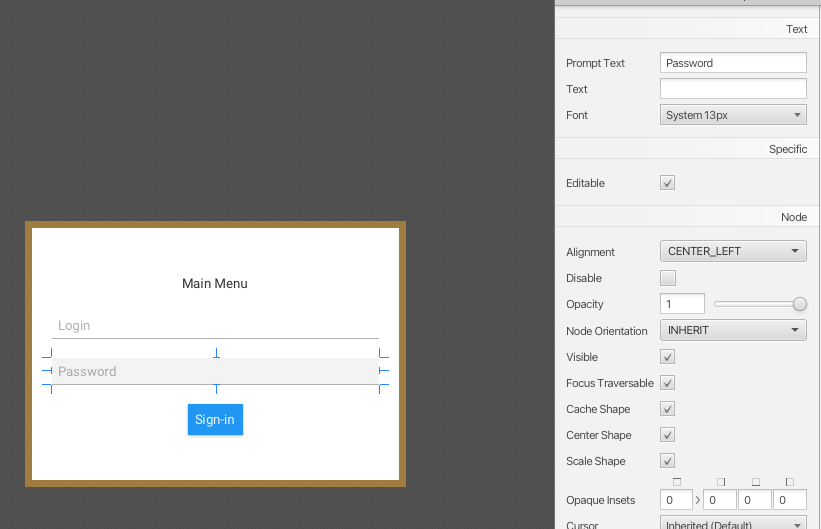
Step 11. Using Scene Builder, change the src/main/resources/fxml/main_menu.fxml file by adding 2 text fields and 1 button as shown below. You should add “Login” and “Password” as prompt texts.
Step 12. Execute git status. You should see that the file main_menu.fxml is changed, and we should add it to the next commit.
On branch feature/sign-in
Changes not staged for commit:
  (use "git add <file>..." to update what will be committed)
  (use "git restore <file>..." to discard changes in working directory)
	modified:   src/main/resources/fxml/main_menu.fxml

no changes added to commit (use "git add" and/or "git commit -a")
Step 13. You can either do:
git add src/main/resources/fxml/main_menu.fxml
git commit -m "Adding the text fields and button for sign-in"
or the equivalent shortcut:
git commit -am "Adding the text fields and button for sign-in"
The command git commit -am "Message" adds all files that have been changed and are already known to the repo. For new files that are still unknown to the Git repo, you should still do git add before git commit.
After either of the two commands, you should see the following:
[feature/sign-in dfb7f3d] Adding the text fields and button for sign-in
 1 file changed, 5 insertions(+)
Step 14. In a real scenario, you will do more commits and finish implementing the functionality. It is important to back up these commits on the remote server. This will also allow your team members to see your branch and maybe contribute to it. It is good practice to push to this new branch regularly. However, git push will not work! In fact, if you execute git push you will see the following error:
fatal: The current branch feature/sign-in has no upstream branch.
To push the current branch and set the remote as upstream, use

    git push --set-upstream origin feature/sign-in
This is because we don’t have a corresponding branch in the remote server. Execute git push --set-upstream origin feature/sign-in as suggested by Git (note that there are shortcuts to avoid doing this. Since this might be the first time you are using branches in Git, just stick with these steps. At least you fully understand what is going on. Shortcuts or Git configs will not help you to understand). Git will tell you that it has created the branch, and it will give you instructions on how to create the pull request from Github.com.
Total 7 (delta 2), reused 0 (delta 0), pack-reused 0
remote: Resolving deltas: 100% (2/2), completed with 2 local objects.
remote:
remote: Create a pull request for 'feature/sign-in' on GitHub by visiting:
remote:      https://github.com/SOFTENG206-2022/lab-github-flow-valerio-terragni/pull/new/feature/sign-in
remote:
To https://github.com/SOFTENG206-2022/lab-github-flow-valerio-terragni.git
 * [new branch]      feature/sign-in -> feature/sign-in
branch 'feature/sign-in' set up to track 'origin/feature/sign-in'.
Step 15. Since this is just to practice the GitHub Flow, we’ll stop here. In a real scenario, you should aim to finish the new feature before opening a pull request and merge the branch into the main branch.
Step 16. If you go to the GitHub.com page of your repository, you will see that there is the new branch.
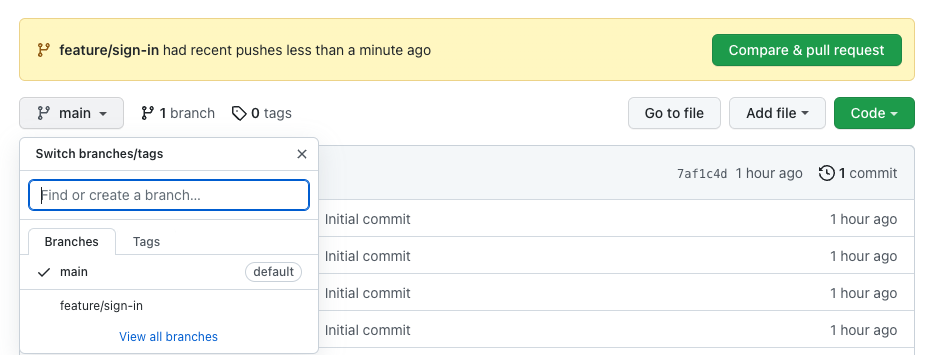
Step 17. To open a pull request, click on the button Compare and Pull Request.
Step 18. Git will tell you if there are conflicts. A conflict arises when two separate branches have made edits to the same line in a file. This is not the case, and Github will tell you that the pull request can be merged automatically.
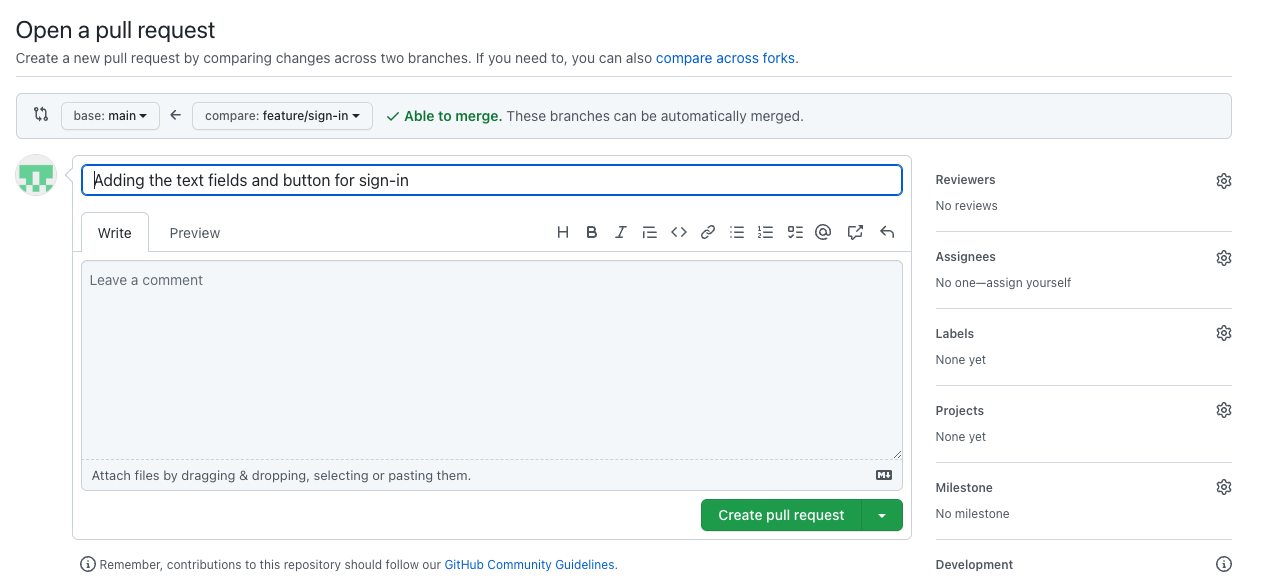
Step 19. You should write a message that describes the pull request. Then, press on Create pull request.
Step 20 Now your team members can see the pull request. They should review the code and give you suggestions for improvement. For example, let’s assume that a team member gives you the following comment:
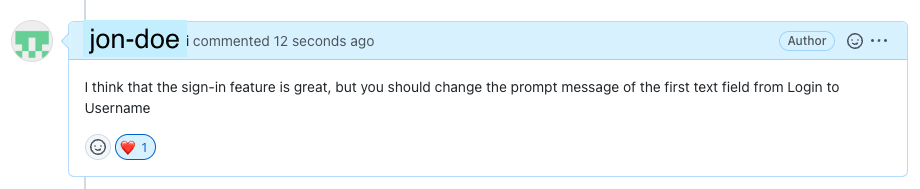
Note that you can reply to comments and start a conversation.
Step 21. If you want to implement the change, you can simply modify the files and do another commit and push. GitHub will automatically update the pull request! You must not create another pull request.
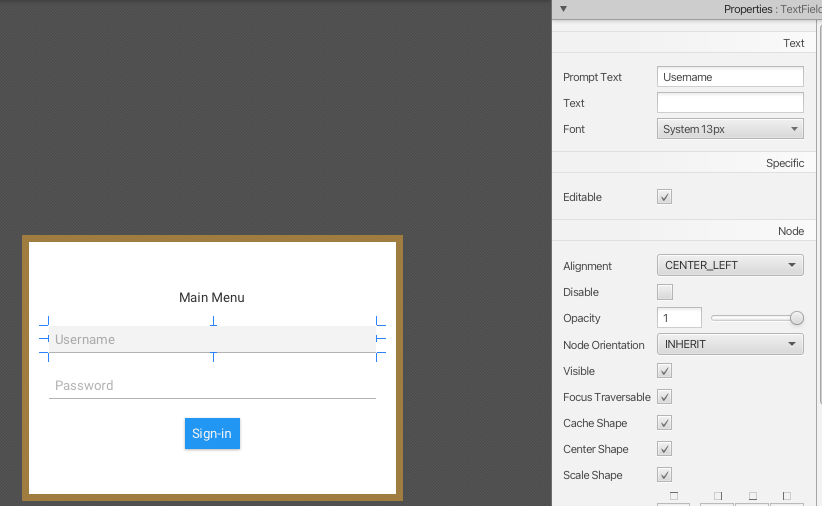
Modify the src/main/resources/fxml/main_menu.fxml file as suggested and do commit and push
>git status
On branch feature/sign-in
Your branch is up to date with 'origin/feature/sign-in'.

Changes not staged for commit:
  (use "git add <file>..." to update what will be committed)
  (use "git restore <file>..." to discard changes in working directory)
        modified:   src/main/resources/fxml/main_menu.fxml

no changes added to commit (use "git add" and/or "git commit -a")

> git commit -am "change prompt of the first text field from Log-in to Username"
[feature/sign-in 8c8223a] change prompt of the first text field from Log-in to Username
 1 file changed, 1 insertion(+), 1 deletion(-)

>git push
Enumerating objects: 13, done.
Counting objects: 100% (13/13), done.
Delta compression using up to 8 threads
Compressing objects: 100% (4/4), done.
Writing objects: 100% (7/7), 549 bytes | 549.00 KiB/s, done.
Total 7 (delta 2), reused 0 (delta 0), pack-reused 0
remote: Resolving deltas: 100% (2/2), completed with 2 local objects.
To https://github.com/SOFTENG206-2022/lab-github-flow-valerio-terragni.git
   dfb7f3d..8c8223a  feature/sign-in -> feature/sign-in
Step 22. You can now see a new commit, under the comment.

It is under because the commit was done after the comment was made. You can consider the pull request page as a timeline (history) of the pull request.
Step 23. When one of your team members is happy with your pull request, they will click on the Merge Pull Request button.
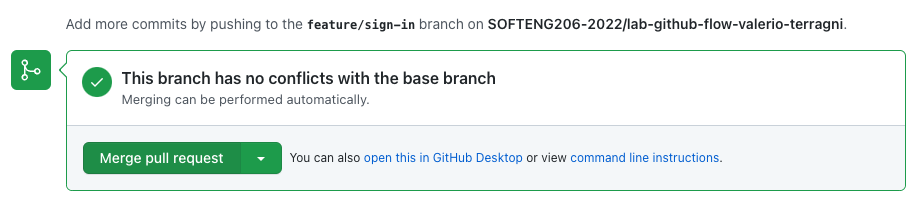
Note that for the Beta and Final releases, you cannot accept your own pull request (this is a Git violation, and you will lose marks). Only for this lab exercise you are allowed do it. Click on Merge Pull Request and Confirm Merge afterward.
Step 24. The pull request is now merged and closed and you should delete the branch
Step 25. If you go to the code page, you can see that now there is only one branch: main, and it contains your changes.
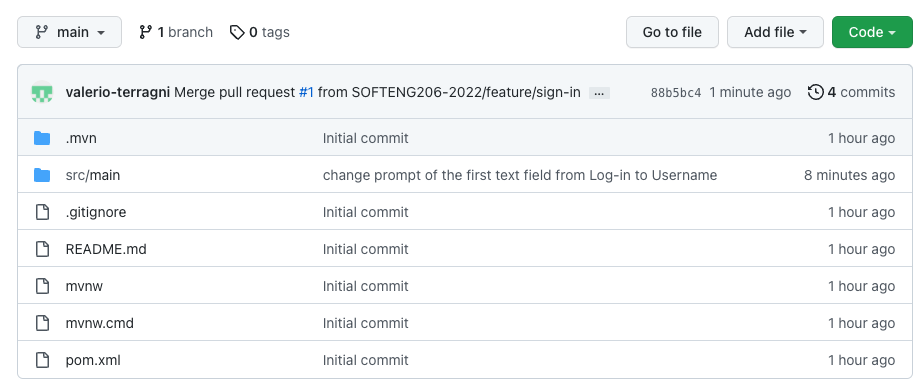
Step 26. It is not over. There is one more thing to do. Go back to the terminal and execute git status.
On branch feature/sign-in
Your branch is up to date with 'origin/feature/sign-in'.

nothing to commit, working tree clean
You are still on the feature/sign-in on your local repository. But the branch does not longer exist! How come? Easy to fix! You need to go back to the main branch.
>git checkout main
Switched to branch 'main'
Your branch is up to date with 'origin/main'.
And then do a git pull.
The main branch will contain the merge code, and the branch will disappear. To delete branch locally you can do git branch -d branch-name
>git branch
* main
Get your hands dirty! Resolve Merge Conflicts
Step 1. Let’s practice resolving merge conflicts, which is something that you need to learn how to do it. It is something that every developer encounters frequently. It is definitely something that you will encounter during the team project.
Step 2. Create a new branch and switch to it:
>git branch conflict
>git checkout conflict
Switched to branch 'conflict'
Step 3. In App.java change the size of the stage as follows:
scene = new Scene(loadFXML("main_menu"), 440, 380);
Step 4 Commit and push.
> git commit -am "change size scene (make it smaller)"
> git push --set-upstream origin conflict
Step 5. Go to the page of the repo and navigate to App.java and press edit (the pencil icon)
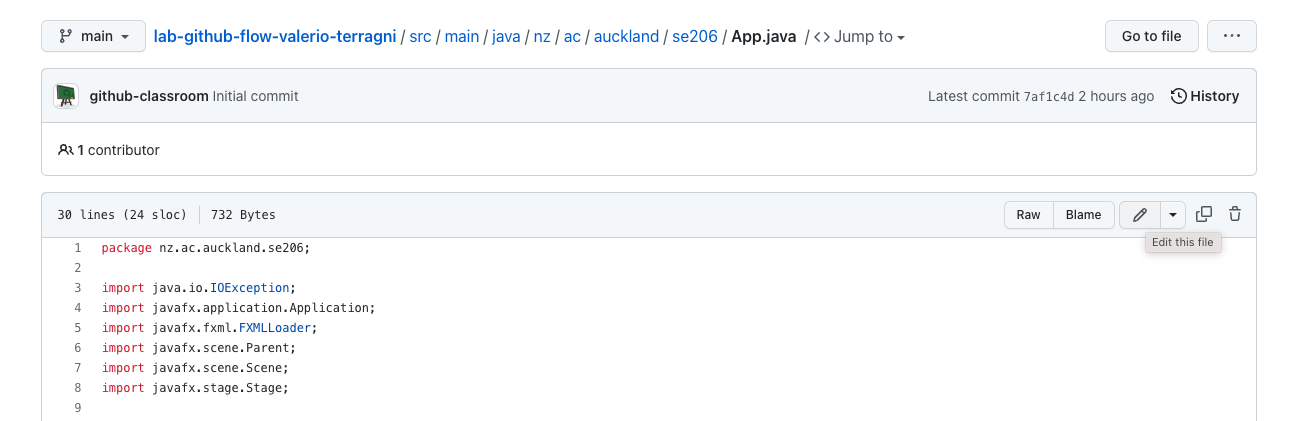
Step 6. Change the size of the scene to
scene = new Scene(loadFXML("main_menu"), 600, 400);
Step 7. Press Commit Changes
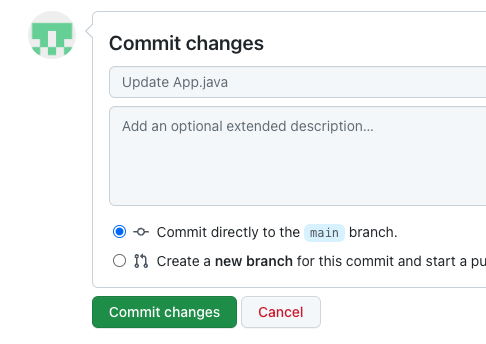
Note that we are doing so to create a conflict, it is not a good practice to change source code from GitHub.com.
Step 8. Now go to “Pull Request” and open one with the branch conflict by pressing “Compare and Pull Request”
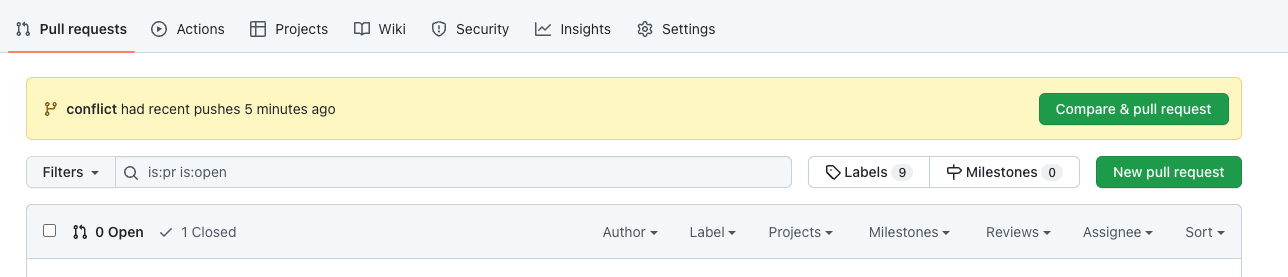
Step 9. GitHub will tell you that you cannot automatically merge because there are conflicts! Indeed, your branch and the main branch have both changed the same line of code.

Step 10. It is good practice to merge the latest version of the main into the new branch, to ensure that your branch is “compatible” with the new version of the main. Do the following:
git checkout main
git pull
git checkout conflict
git merge main
You first switch to the main branch, do a pull to get the latest changes, then you go back to the conflict branch and merge with the main. This will be the output of the commands above:
> git checkout main
Switched to branch 'main'
Your branch is up to date with 'origin/main'.
> git pull
remote: Enumerating objects: 19, done.
remote: Counting objects: 100% (19/19), done.
remote: Compressing objects: 100% (5/5), done.
remote: Total 10 (delta 2), reused 0 (delta 0), pack-reused 0
Unpacking objects: 100% (10/10), 1.02 KiB | 130.00 KiB/s, done.
From https://github.com/SOFTENG206-2022/lab-github-flow-valerio-terragni
   88b5bc4..668a1ac  main       -> origin/main
Updating 88b5bc4..668a1ac
Fast-forward
 src/main/java/nz/ac/auckland/se206/App.java | 2 +-
 1 file changed, 1 insertion(+), 1 deletion(-)
> git checkout conflict
Switched to branch 'conflict'
Your branch is up to date with 'origin/conflict'.
> git merge main
Auto-merging src/main/java/nz/ac/auckland/se206/App.java
CONFLICT (content): Merge conflict in src/main/java/nz/ac/auckland/se206/App.java
Automatic merge failed; fix conflicts and then commit the result.
Step 11. Now, we need to fix the conflicts. If you open App.java you will see:
/** JavaFX App */
public class App extends Application {

  private static Scene scene;

  @Override
  public void start(Stage stage) throws IOException {
<<<<<<< HEAD
    scene = new Scene(loadFXML("main_menu"), 440, 380);
=======
    scene = new Scene(loadFXML("main_menu"), 600, 400);
>>>>>>> main
    stage.setScene(scene);
    stage.show();
  }
}
Step 12. You can see both versions. Inside <<<<<<< HEAD ======= there is the version in the branch conflict. Inside ======= >>>>>>> main there is the version in the branch main. You need to choose one version. Let’s choose the one on the main.
Step 13. You need to remove the markers, and keep the version you want. Make sure the Java file compiles ok.
/** JavaFX App */
public class App extends Application {

  private static Scene scene;

  @Override
  public void start(Stage stage) throws IOException {
    scene = new Scene(loadFXML("main_menu"), 600, 400);
    stage.setScene(scene);
    stage.show();
  }
}
Step 14. Add the file to the next commit (git add src/main/java/nz/ac/auckland/se206/App.java). Do a git commit and git push. Now, if you go to see the pull request that you have just opened, you will see that the conflicts are gone. Note that Git can handle most merges on its own with automatic merging features. A conflict arises only when two separate branches have made edits to the same line in a file. If the changes involve the same files, but different lines, there are no merge conflicts. However, you still need to check the code because maybe the behaviour of the new merged version is compromised.